首先,要新增一個file, /usr/syno/bin/ddns/namecheap.php
既然之前都教左大家可以用 Config File Editor 去修改DSM嘅System file,
當然今次都會用返佢啦,唔需要再telnet or ssh去做。
先打開 Config File Editor套件,Choose config file,再揀最底Config File Editor
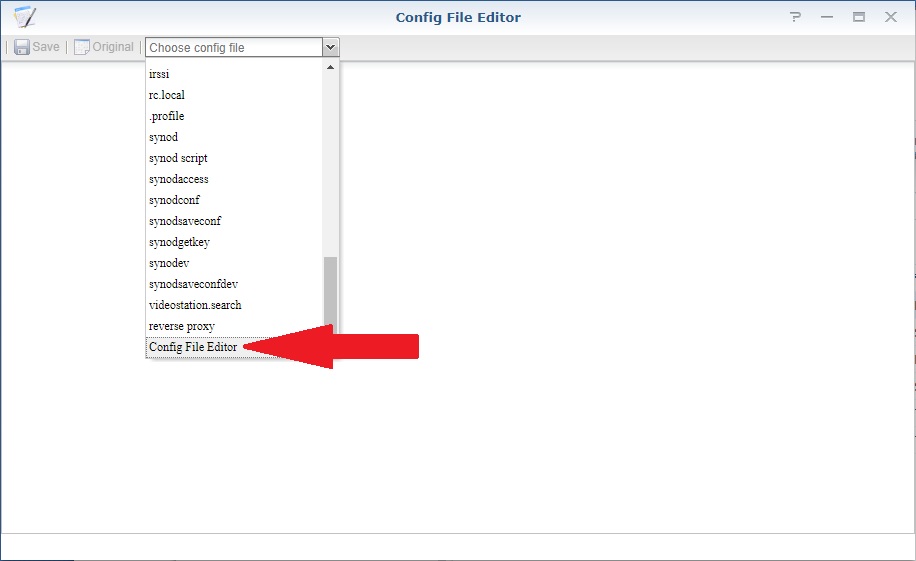
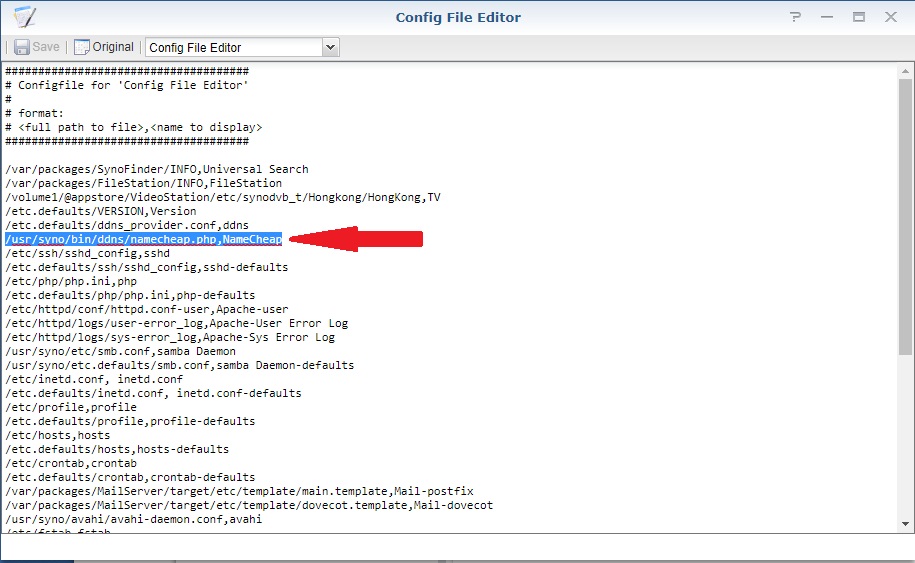
然後加入/usr/syno/bin/ddns/namecheap.php,NameCheap
關閉佢,重開,應該就多左NameCheap可以揀
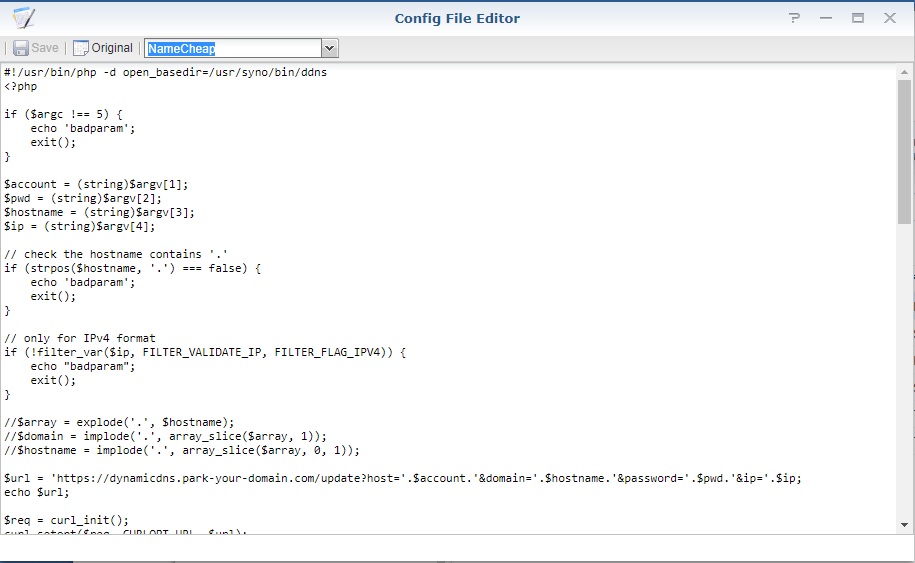
再將以下呢段php code貼上,Save
#!/usr/bin/php -d open_basedir=/usr/syno/bin/ddns
<?php
if ($argc !== 5) {
echo 'badparam';
exit();
}
$account = (string)$argv[1];
$pwd = (string)$argv[2];
$hostname = (string)$argv[3];
$ip = (string)$argv[4];
// check the hostname contains '.'
if (strpos($hostname, '.') === false) {
echo 'badparam';
exit();
}
// only for IPv4 format
if (!filter_var($ip, FILTER_VALIDATE_IP, FILTER_FLAG_IPV4)) {
echo "badparam";
exit();
}
//$array = explode('.', $hostname);
//$domain = implode('.', array_slice($array, 1));
//$hostname = implode('.', array_slice($array, 0, 1));
$url = 'https://dynamicdns.park-your-domain.com/update?host='.$account.'&domain='.$hostname.'&password='.$pwd.'&ip='.$ip;
echo $url;
$req = curl_init();
curl_setopt($req, CURLOPT_URL, $url);
curl_setopt($req, CURLOPT_RETURNTRANSFER, true);
$res = curl_exec($req);
curl_close($req);
/*
Success response:
<?xml version="1.0"?>
<interface-response>
<Command>SETDNSHOST</Command>
<Language>eng</Language>
<IP>%ip-address%</IP>
<ErrCount>%error-count%</ErrCount>
<ResponseCount>%response-count%</ResponseCount>
<Done>true</Done>
<debug><![CDATA[]]></debug>
</interface-response>
%ip-address% = IP address
%error-count% = 0
%response-count% = 0
Failure response:
<?xml version="1.0"?>
<interface-response>
<Command>SETDNSHOST</Command>
<Language>eng</Language>
<ErrCount>%error-count%</ErrCount>
<errors>
<Err1>%error-message%</Err1>
</errors>
<ResponseCount>%response-count%</ResponseCount>
<responses>
<response>
<ResponseNumber>%response-number%</ResponseNumber>
<ResponseString>%response-message%</ResponseString>
</response>
</responses>
<Done>true</Done>
<debug><![CDATA[]]></debug>
</interface-response>
%error-count% = 1
%error-message% = Error message
%response-count% = 1
%response-number% = Code for response message
%response-message% = Response message (similar to %error-message%)
*/
$xml = new SimpleXMLElement($res);
if ($xml->ErrCount > 0) {
$error = $xml->errors[0]->Err1;
if (strcmp($error, "Domain name not found") === 0) {
echo "nohost";
} elseif (strcmp($error, "Passwords do not match") === 0) {
echo "badauth";
} elseif (strcmp($error, "No Records updated. A record not Found;") === 0) {
echo "nohost";
} else {
echo "911 [".$error."]";
}
} else {
echo "good";
}
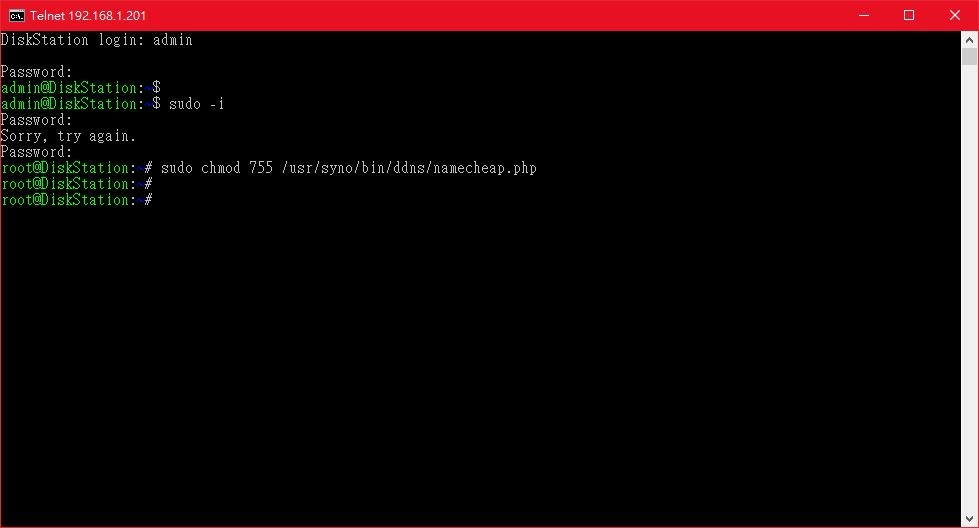
再來就是...無法避免用telnet或者ssh的步驟,因為要修改我們剛剛建立的檔案的權限
先在DSM內打開telnet或者ssh的功能,以下用telnet做例子,
現行DSM版本都不能直接用root登入,要先以admin登入,再輸入sudo -i來切換成root使用者,
而且一定會出現Sorry, try again,不用怕,再輸入一次密碼就可以了,最後輸入sudo chmod 755 /usr/syno/bin/ddns/namecheap.php就可以了
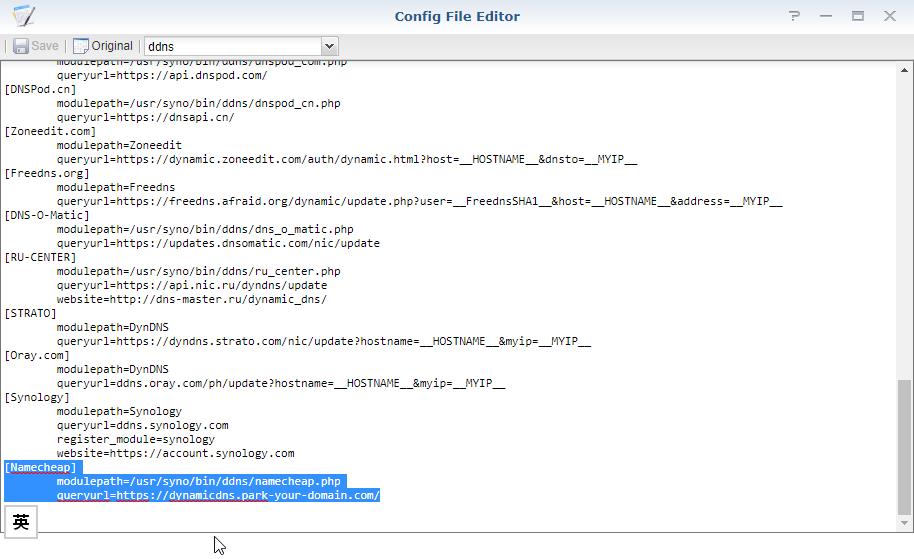
現在,我們再回到Config File Editor裡,有看過上一篇的話,應該已經加了ddns,
只要在最底加上以下這一段,再儲存就可以了。
(以下這段適用於DSM 6.1.7或以前版本)
[Namecheap]
modulepath=/usr/syno/bin/ddns/namecheap.php
queryurl=https://dynamicdns.park-your-domain.com/
(以下這段適用於DSM 6.2或以後版本)
[Namecheap]
modulepath=/usr/syno/bin/ddns/namecheap.php
queryurl=https://dynamicdns.park-your-domain.com/update
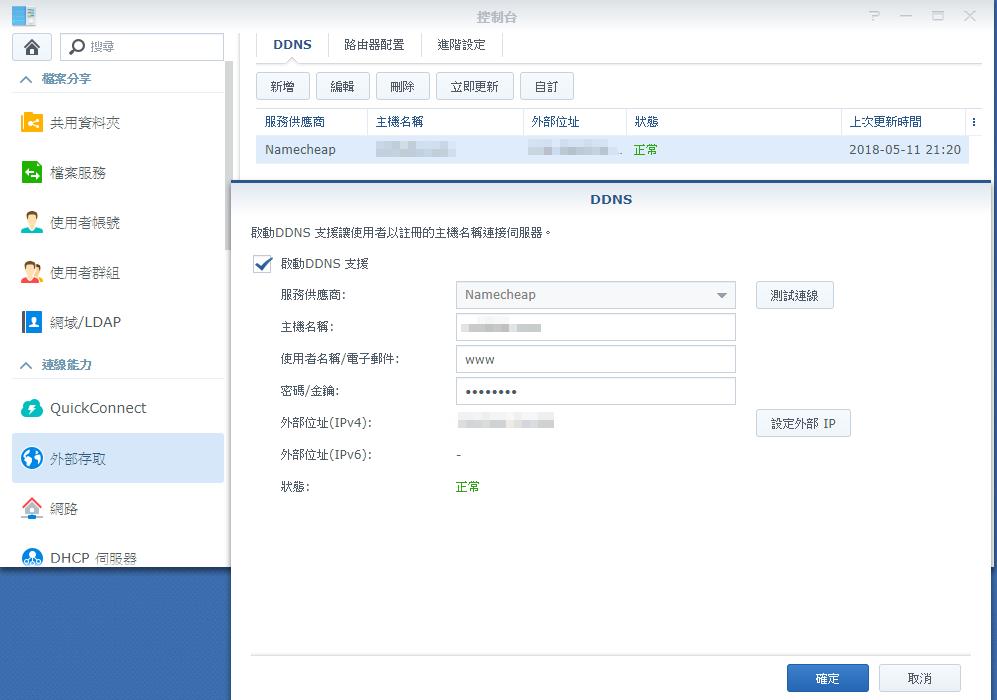
重新啟動你的NAS一次,就可以在外部存取裡找到NameCheap的DDNS了。